Co-Signer部署
I. Co-Signer 服务器配置要求
CPU最低要求: AMD64 或ARM64 架构,8核,主频2.0 GHz
内存:64GB
硬盘:256GB
OS:Ubuntu-22.04
II. Co-Signer 部署流程
获取Co-Signer
- 普通版本
运行程序下载
文件地址: https://github.com/ChainUp-Custody/mpc-co-signer/releases, 选择co-signer-linux-(version)-static版本,该版本Linux可直接运行
以版本v1.3.1为例,请在实际使用时替换相关版本
wget https://github.com/ChainUp-Custody/mpc-co-signer/releases/download/v1.3.1/co-signer-linux-v1.3.1-static
修改程序可执行权限
chmod +x co-signer-linux-v1.3.1-static
mv co-signer-linux-v1.3.1-static co-signer
- SGX版本(步骤1-7)
购买微软云sgx服务器
安装ego环境
sudo apt-get install software-properties-common
sudo apt install snapd
sudo wget -qO- https://download.01.org/intel-sgx/sgx_repo/ubuntu/intel-sgx-deb.key | sudo apt-key add
sudo add-apt-repository "deb [arch=amd64] https://download.01.org/intel-sgx/sgx_repo/ubuntu `lsb_release -cs` main"
sudo wget https://github.com/edgelesssys/ego/releases/download/v1.3.0/ego_1.3.0_amd64.deb
sudo apt install -y ./ego_1.3.0_amd64.deb build-essential libssl-dev
创建工作目录
以目录/data/co-signer/为例,请在实际使用时替换相关目录
mkdir -p /data/co-signer/
切换到工作目录
cd /data/co-signer/
下载程序
以版本v1.3.1为例,请在实际使用时替换相关版本
文件地址: https://github.com/ChainUp-Custody/mpc-co-signer/releases, 选择co-signer-linux-(version) 版本,请按照后续步骤使用ego进行编译打包
wget https://github.com/ChainUp-Custody/mpc-co-signer/releases/download/v1.3.1/co-signer-linux-v1.3.1
注意:v1.1.0版本后支持SGX
在工作目录下添加配置文件enclave.json, 配置文件内容如下
重要提示
-
配置文件中exe的值:co-signer-linux-v1.3.1(示例), 如果修改了可执行程序名称,exe的值需修改为自定义名称
-
配置文件规定Co-Signer 只能在目录/data/co-signer/(示例)下运行, 如需自定义运行目录, 请将配置中的所有的 /data/co-signer/修改为自定义目录
-
堆内存,heapSize配置建议配置为:60G (61440)
cat>./enclave.json<< EOF
{
    "exe": "co-signer-linux-v1.3.1",
    "key": "private.pem",
    "debug": false,
    "heapSize": 61440,
    "executableHeap": false,
    "productID": 1,
    "securityVersion": 1,
    "mounts": [{"readOnly":false, "type":"hostfs", "source":"/etc/ssl/certs/", "target":"/etc/ssl/certs/"},{"readOnly":false, "type":"hostfs", "source":"/data/co-signer/", "target":"/data/co-signer/"}],
    "env": [{"name":"HOME","fromHost":true},{"name":"PWD","value":"/data/co-signer/"}],
    "files": null
}
EOF
重新sign并打包后得到可运行sgx运行程序
以版本v1.3.1为例,请在实际使用时替换相关版本
ego sign

ego bundle co-signer-linux-v1.3.1
mv co-signer-linux-v1.3.1-bundle co-signer
运行Co-Signer
可执行程序查看帮助:co-signer -h, 结果如下:
v1.1.0

Usage: co-signer [-hv] [-server] [-rsa-gen] [-recover-seed mnemonic] [-rsa-pri-import rsa private key] [-verify-sign-pub-import develop rsa public key to verify unsign transaction] [-keystore-gen] [-custody
-pub-import]

Options:
    -custody-pub-import string
            import custody public key
    -h this is help
    -keystore-gen
            Used to merge files (including seed.dat, rsaPri.pem, etc.) to generate a new keystore.json file
    -recover-seed string
            recover seed by mnemonic, use '-' between each word
    -rsa-gen
            generate rsa pem by tools
    -show-rsa string
    -rsa-pri-import string
            import current rsa private key
    -server
            start co-signer otherwise only tools
    -v this is version
    -verify-sign-pub-import string
            import the public key used for verifying sign


## 说明
1. -v                         获取co-signer版本号
2. -server                    启动co-signer参数,启动时不使用该参数则为工具模式
3. -conf                      启动co-signer时指定配置文件, 默认为:./conf/config.yaml
4. -rsa-gen                   工具模式:输入启动密码,生成加密的私钥和未加密的公钥,生成至keystore.json文件中
5. -rsa-pri-import            工具模式:输入启动密码,导入现有的rsa私钥,生成加密后的rsa私钥文件(仅导入私钥),生成至keystore.json文件中
6. -verify-sign-pub-import    工具模式:导入校验客户签名(sign)使用的公钥,生成至keystore.json文件中;导入后co-signer会校验提现和web3客户签名(sign),sign生成方式详见API文档
7. -custody-pub-import        工具模式:输入启动密码,导入custody的公钥,生成至keystore.json文件中
8. -keystore-gen              工具模式:用于将v1.0.x版本的seed.dat,rsaPri.pem,rsaPub.pem等文件统一导入至keystore.json文件
9. -show-rsa                  工具模式:显示所用到的RSA公钥
手动配置并启动Co-Signer
在可执行程序同级目录创建文件夹
mkdir conf
在conf目录下添加配置文件,文件名: config.yaml
配置文件内容如下:
## 主配置信息
main:
    ## 【必填】co-signer的服务ip地址
    tcp: "0.0.0.0:28888"
    ## 【必填】v1.1.x版本使用的加密存储文件
    keystore_file: "conf/keystore.json"

## custody系统
custody_service:
    ## 【必填】app_id,创建商户后获取
    app_id: ""
    ## 【必填】api域名地址,见接口文档
    domain: "https://openapi.chainup.com/"
    ## 【可选】请求获取响应语言,支持zh_CN和en_US
    language: "zh_CN"

## 客户系统
custom_service:
    ## 【可选】withdraw签名前回调客户系统地址确认交易是否正常,详情见:https://custodydocs-zh.chainup.com/api-references/mpc-apis/co-signer/callback/withdraw,未配置时需要强制验证sign
    withdraw_callback_url: ""
    ## 【可选】web3交易签名前回调客户系统地址确认交易是否正常,详情见:https://custodydocs-zh.chainup.com/api-references/mpc-apis/co-signer/callback/web3,未配置时需要强制验证sign
    web3_callback_url: ""
配置Co-Signer使用的Rsa私钥
方式一:Co-Signer生成Rsa公私钥
./co-signer -rsa-gen
执行如上命令后,按提示输入Co-Signer 启动密码。执行成功后conf目录下生成\更新文件:keystore.json
私钥为请求Custody服务时加密请求参数使用,私钥对应公钥需配置到Custody, Custody使用该公钥解密Co-Signer 请求数据
方式二:客户生成Rsa私钥,并导入Co-Signer
./co-signer -rsa-pri-import MIIEvwIBADANBgkqhkiG9w0BAQEFAASCBKkwggSlAgEAAoIBAQCzoQHv17B0tMPPLn8JzQd4OAovEYYhAyKXSK4WTvnf/WHsspzo4n3gpjdQPuQysri5iMIocAnZYgmQCosDiOIYSx4p9HJxTYRIzPZ25SjMtpxbzgHQtyIaw4CcPkE6CF7vDUpwil1T9NfegsvhWZ/9wAOf4AJmJIEvOnbAIq6DMpgGu59mWidRKls7UtQ9cwf2NYcE3eUE985juCsDOummmWLS1hBto7nCIiEhtXCGJgWCZyVrAWQZ10tIo0XW5ftiCU4EE5GgWNi6xA6GL6/xdygsCh3tsKRUfcfHIAFmEhVJoUrMiuws5xua1qPotz0t2Tm5QTHkrCGUeizzDJjhAgMBAAECggEBAIvnx35q3ADKGghwCnozurGj1Cq811829eYmsZCminAvBeo5Y4Tvg2NJkqNpmIr0MHQxVCfyu3kYpqIN1CA4qQCK4T+EKO6elX2uRfhsm852HGpUlY1eVa3Kv4zx4BO3GVnPXD8zRWVyuf+QmAM4rygQOcJ30uaDYCrMulkDqjB8FF8JrE0ycCdT2lvEvAAU3e8YeDRaOaYkBhRjDVntE+VjAyCDgvqtgwpI1A7iYK5o/lU+64BlQkp6xpglN5BF1aXwj3O4+zT7WJBkZqPMOHO11o81w3oCDXO9xZPMnjsO7o5HPKhCkEiaLQrymzzbgR7UYLP56OkTnlSb6sYG99ECgYEA6AxypkvKlc4fU6PIIfxUsJfjJyRIucg+SsiOFxJDQ1JWx6sCKnj2Ak4T/bPLmBEAeoBCnRH8EviovYsUSn0VOj92akODOilywB8GSnLWg+0D7v3sKQVcKd2ykRTk9nS3YRz1nFX+SsdWrrCk7g3aLw6BiGz/uSVEmzqOXf6D2dMCgYEAxitx0iFytrdnD8dfPr0C/OSZUG0UIC6DU/BWlbY3Ws6EpQxPiZp7NtKLNS9UohFk89YplZJKnVfX0vTtnJMaXn7iTf6XNTr2o4hwCK8CIB8Zjw56oCaDBdwbOxoOVh0Kpt4uueFg9GTPP6a6+kk/APNcbekpJzRMQ8RqE4OuffsCgYEAqYT2eMAjtj7Hqe2bdiCFqiC7xEuAiaBcyXssOnSQCO1tEh6+zVJivhpWBmBD2sqI4/UxNNf/o8heVWH2J9irGktkcYryohnHh8ziZp7wUZ5j4kNENE+DHd6k5dIy1k077kkesOAtjmmDzMilJHegLgJV5NlkE9jC/vfPK6GUpxsCgYAV3jVxOr+t6g81borUIYdy4McKWP8fjgJwANWNL85r9t4sWG9uf92Y7yLte4ubVtANGFT+bGZPdqIaZWzTGmiOhPH0KWQGO7t70FKMosNZSBVJ9A8UHSvYObHHk9iBKDNEtr/xQy2vynAUVhHMDMknEbPhbRldeifwUnxiKuXWgQKBgQCZkVUrQZJ73Qf8jOiBA1x1Frh8yxSdU/mrvWV/SvC31BbHt3aGKPeKFOfTrQVmAgME4JsAOxwIL0X6C5MdxCOy5Lbefgk8OBpkV8VthNzMQbDXjcWgiYO46G5NFE/kbR0CZzqUFgZkqktQw0aONcUaUhxT9YmhCkWzyiuWd4yCLQ==
执行如上命令后,按提示输入Co-Signer 启动密码。执行成功后conf目录下生成\更新文件:keystore.json
私钥为请求Custody服务时加密请求参数使用,私钥对应公钥需配置到Custody, Custody使用该公钥解密Co-Signer 请求数据
Co-Signer 配置Custody公钥
./co-signer -custody-pub-import 'Custody RSA Public key'
执行如上命令后,按提示输入Co-Signer 启动密码。执行成功后conf目录下生成\更新文件:keystore.json
该公钥由Custody提供,Co-Signer 使用该公钥解密Custody服务的返回数据
【可选】Co-Signer 配置不回调客户系统时校验签名(sign)所使用的公钥
./co-signer -verify-sign-pub-import 'RSA Public key'
客户生成RSA公钥
执行如上命令后,按提示输入Co-Signer 启动密码。执行成功后conf目录下生成\更新文件:keystore.json
导入后Co-Signer 会校验提现和web3交易签名(sign),sign生成方式详见Co-Signer交易签名
查看配置后的RSA公钥信息
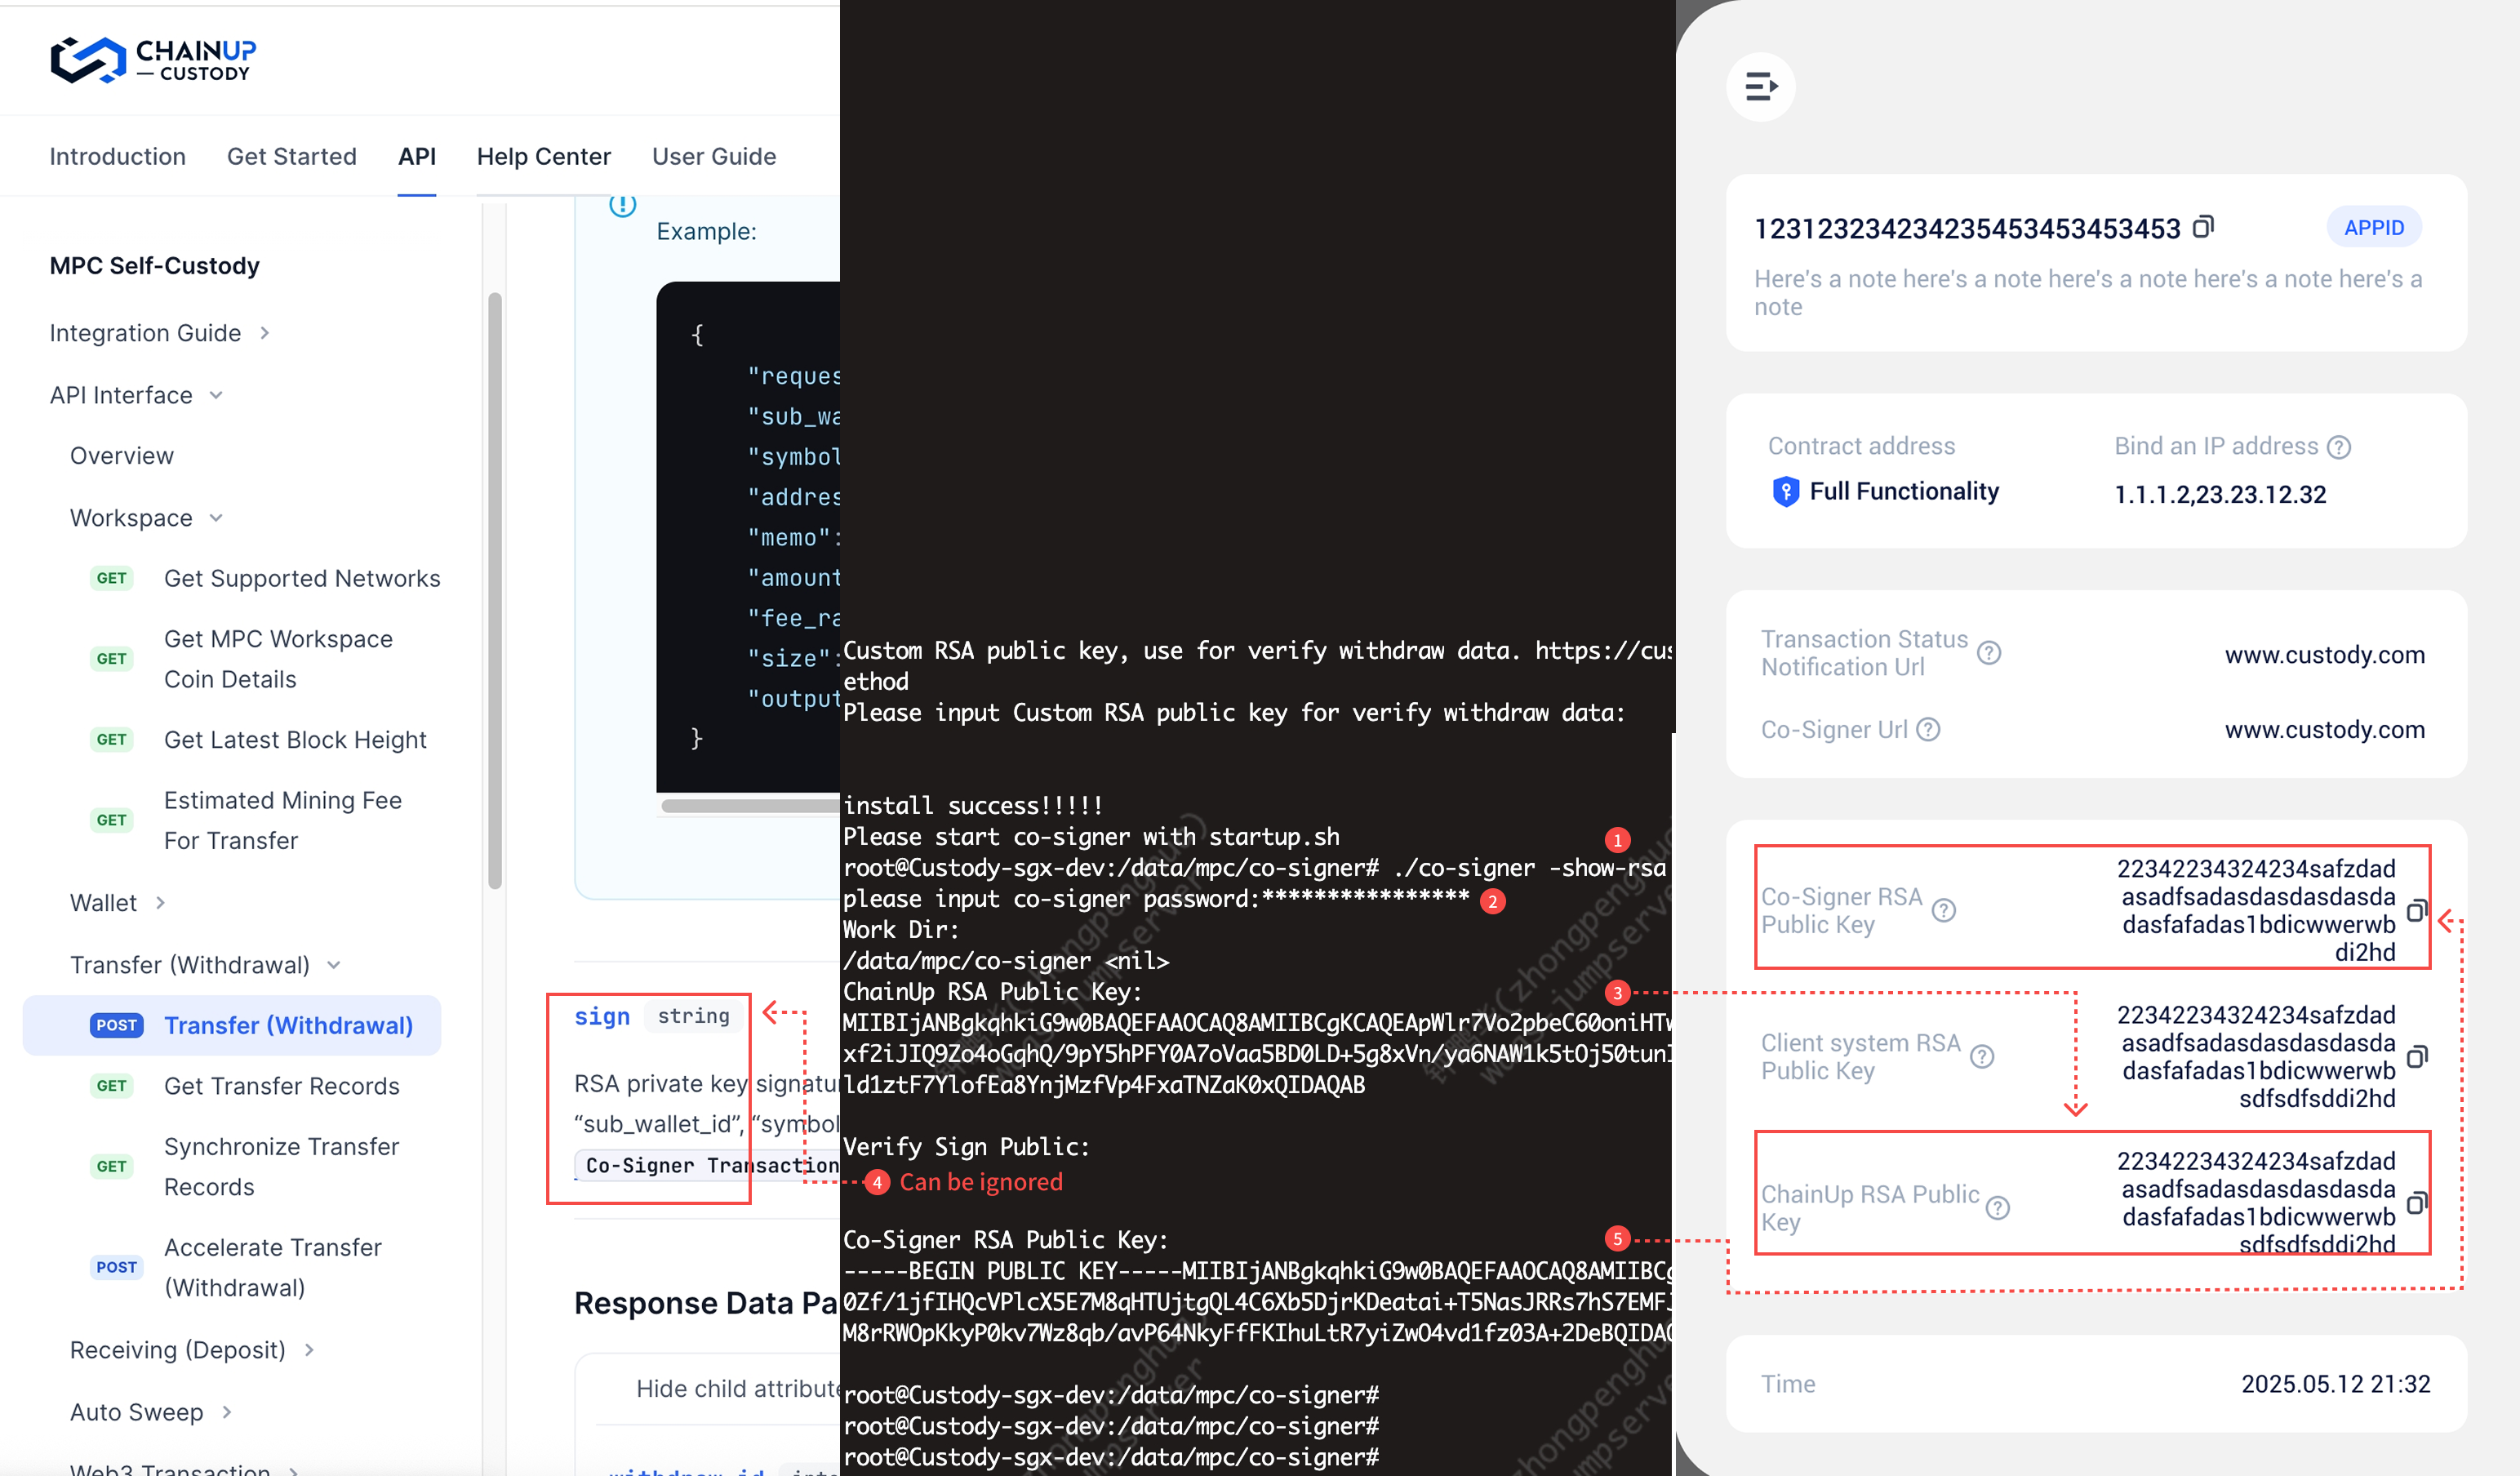
- 启动程序shell脚本示例
启动Co-Signer ,推荐使用shell脚本启动(避免密码泄露到终端)
#!/bin/bash

project_path=$(
    cd $(dirname $0)
    pwd
)

STR_PASSWORD=""
echo -n "Please enter your password:"
stty -echo
read STR_PASSWORD
stty echo


if [ ! -n "$STR_PASSWORD" ]; then
    echo "Password cannot be null"
    exit 1
fi

echo ""
echo "Startup Program..."
echo ""

# start
echo ${STR_PASSWORD} | nohup ${project_path}/co-signer -server >>nohup.out 2>&1 &
III. Co-Signer 快捷部署脚本(推荐)
Custody也提供了更为便捷的部署方式,使用脚本一键式生成配置信息、以及运行环境
请先获取Co-Signer程序,并将程序和sh文件放在同一目录下后进行脚本操作
install.sh
按照提示步骤,导入运行Co-Signer的必要信息和配置
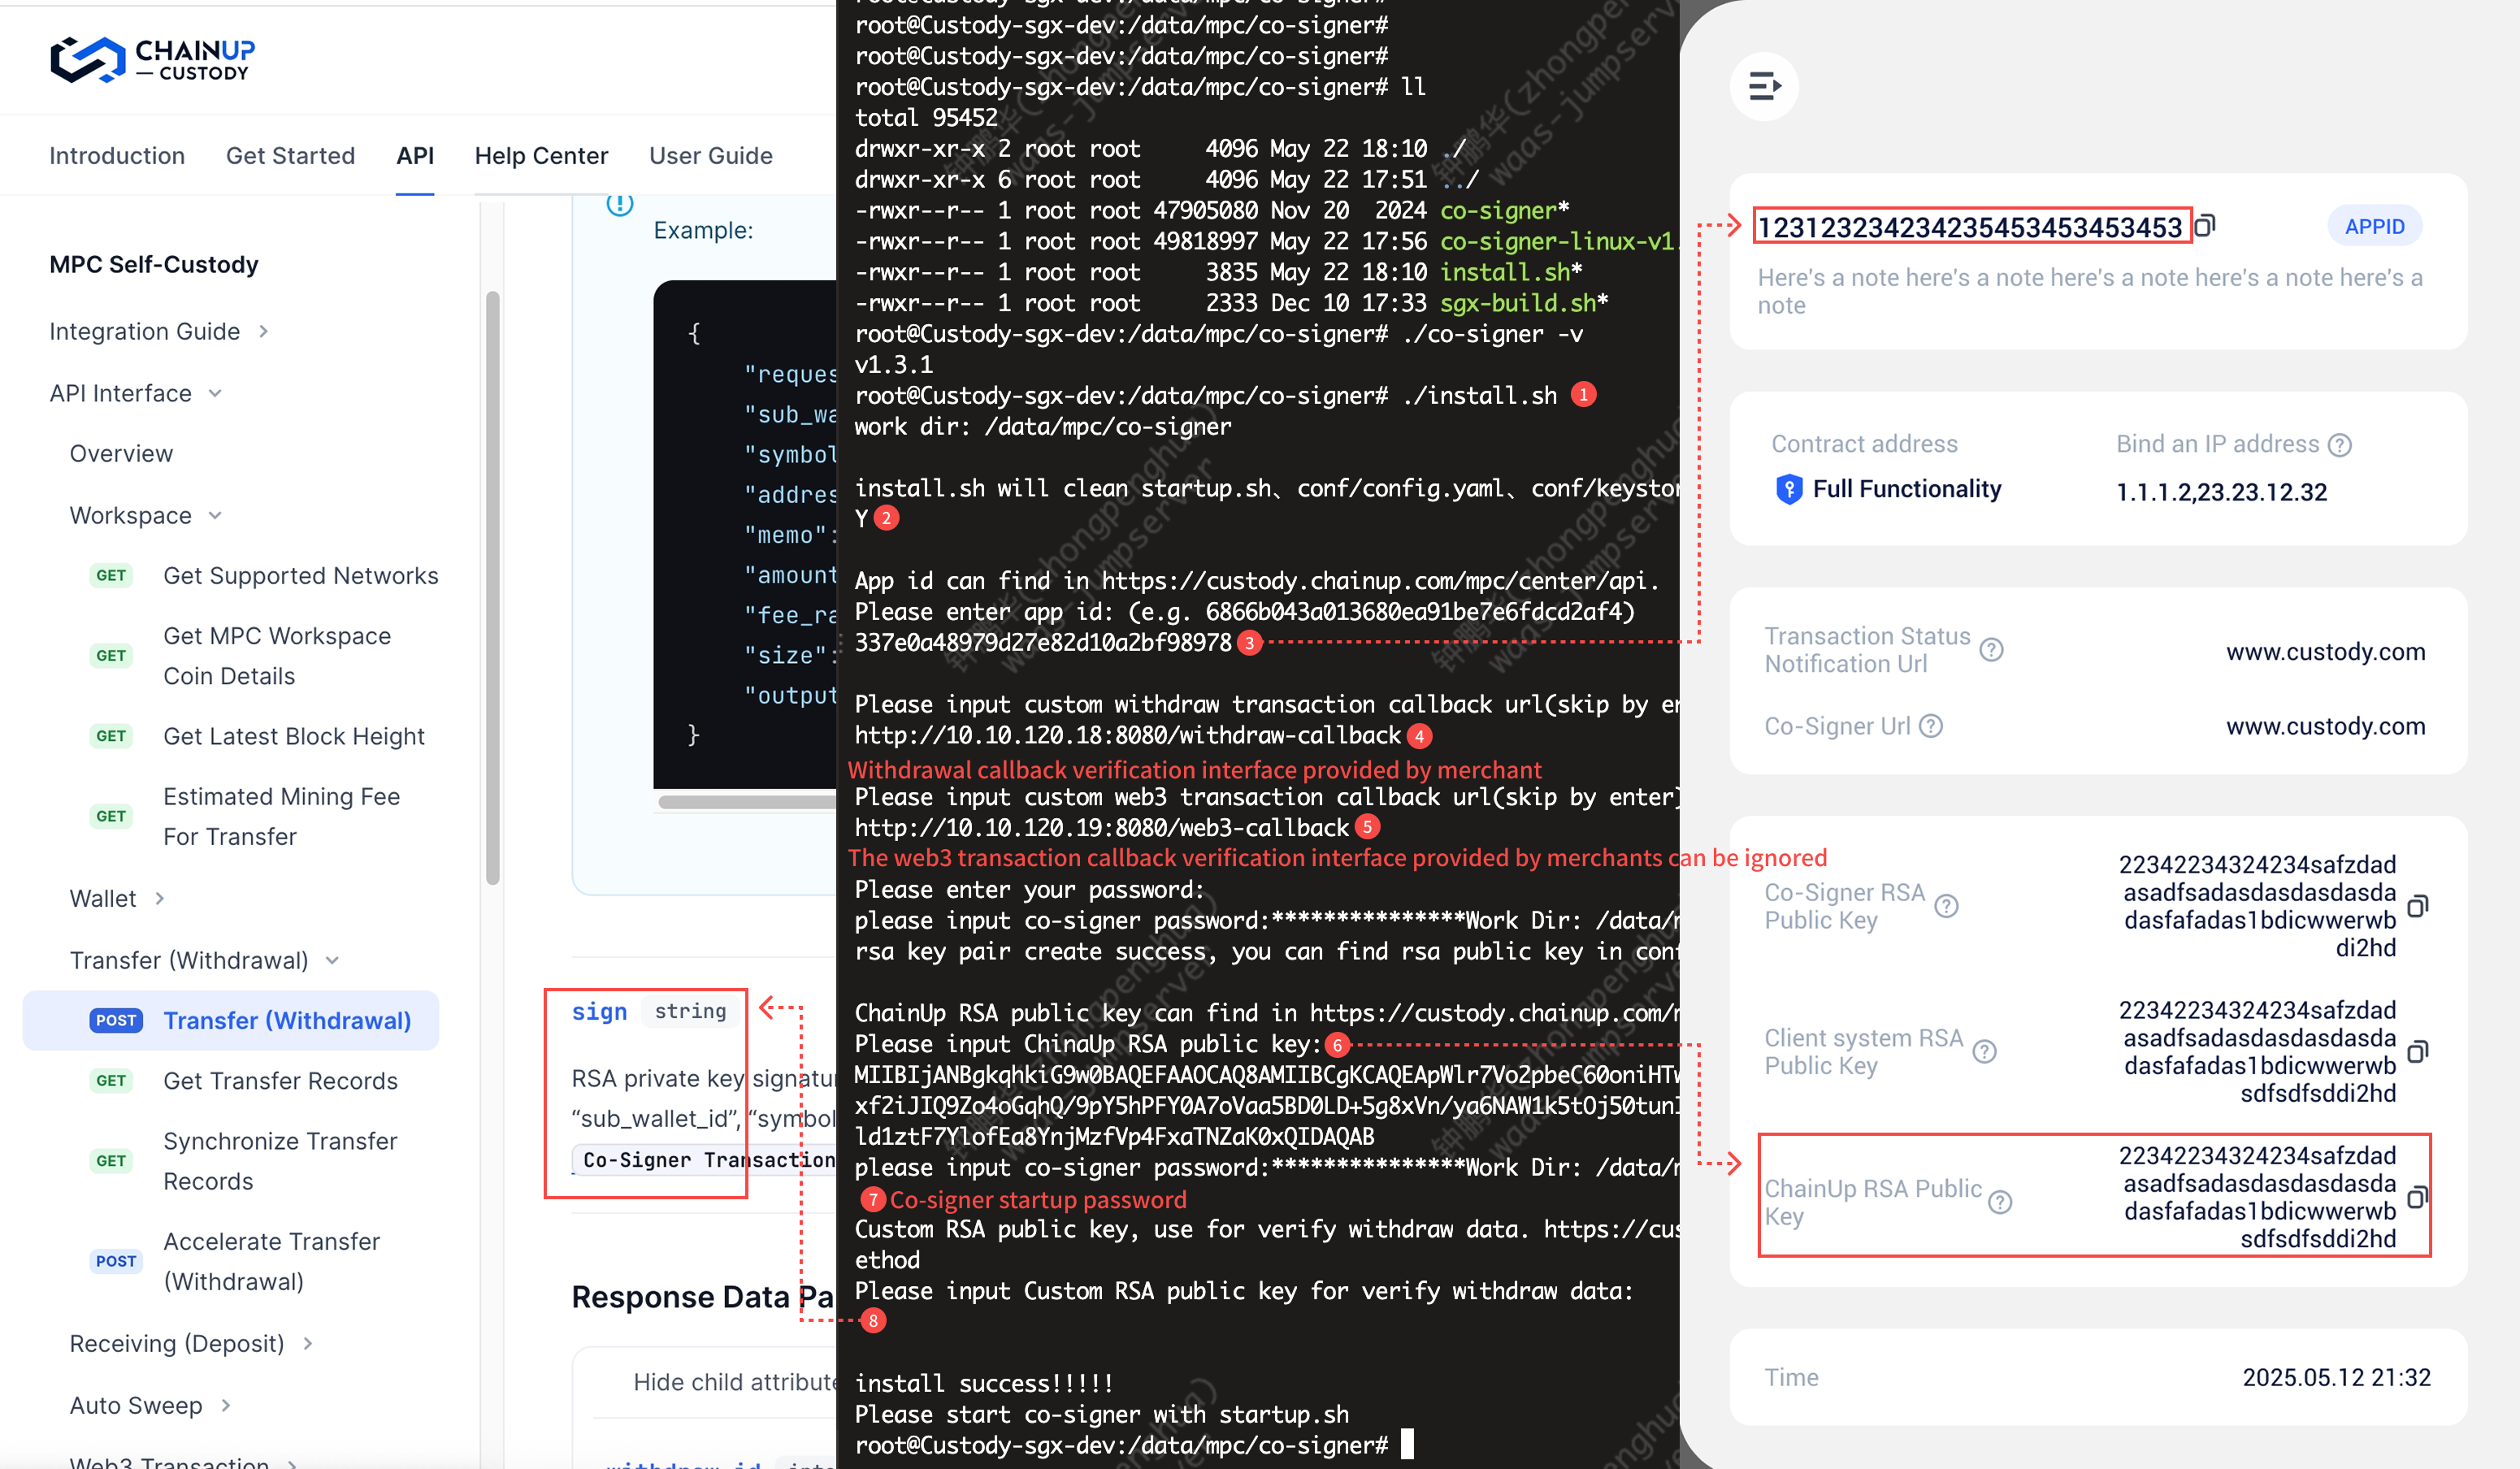
执行`install.sh`脚本
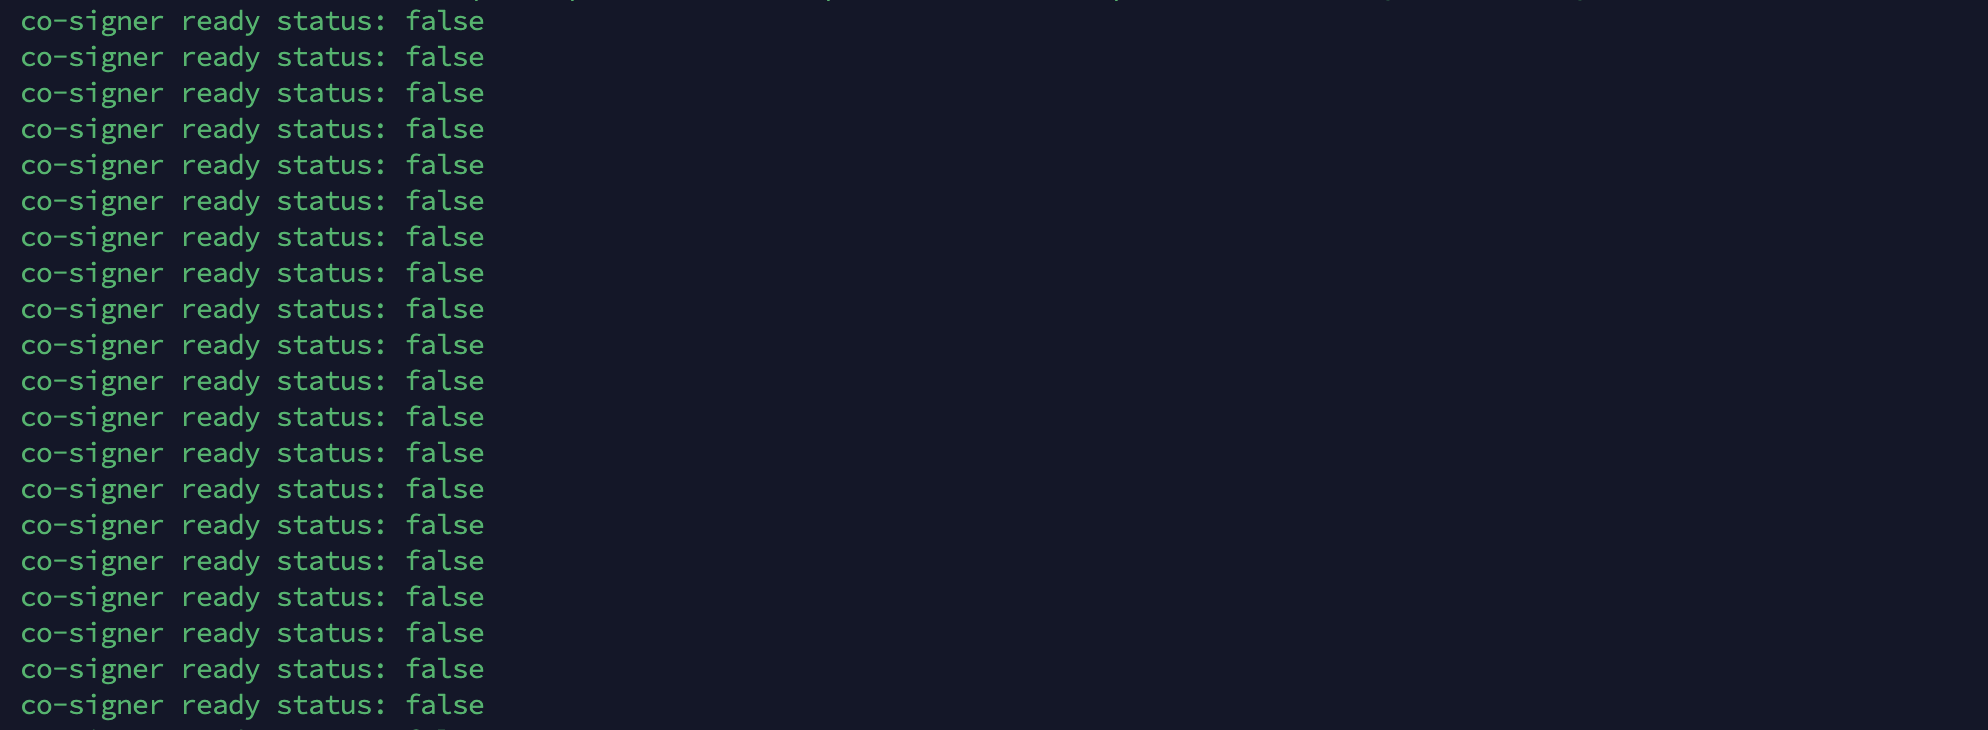
校验与下一步
👉 Co-signer 已完成配置并成功启动,但当前尚未完成初始化,下一步需前往APP执行私钥刷新操作,以使服务进入可用状态。
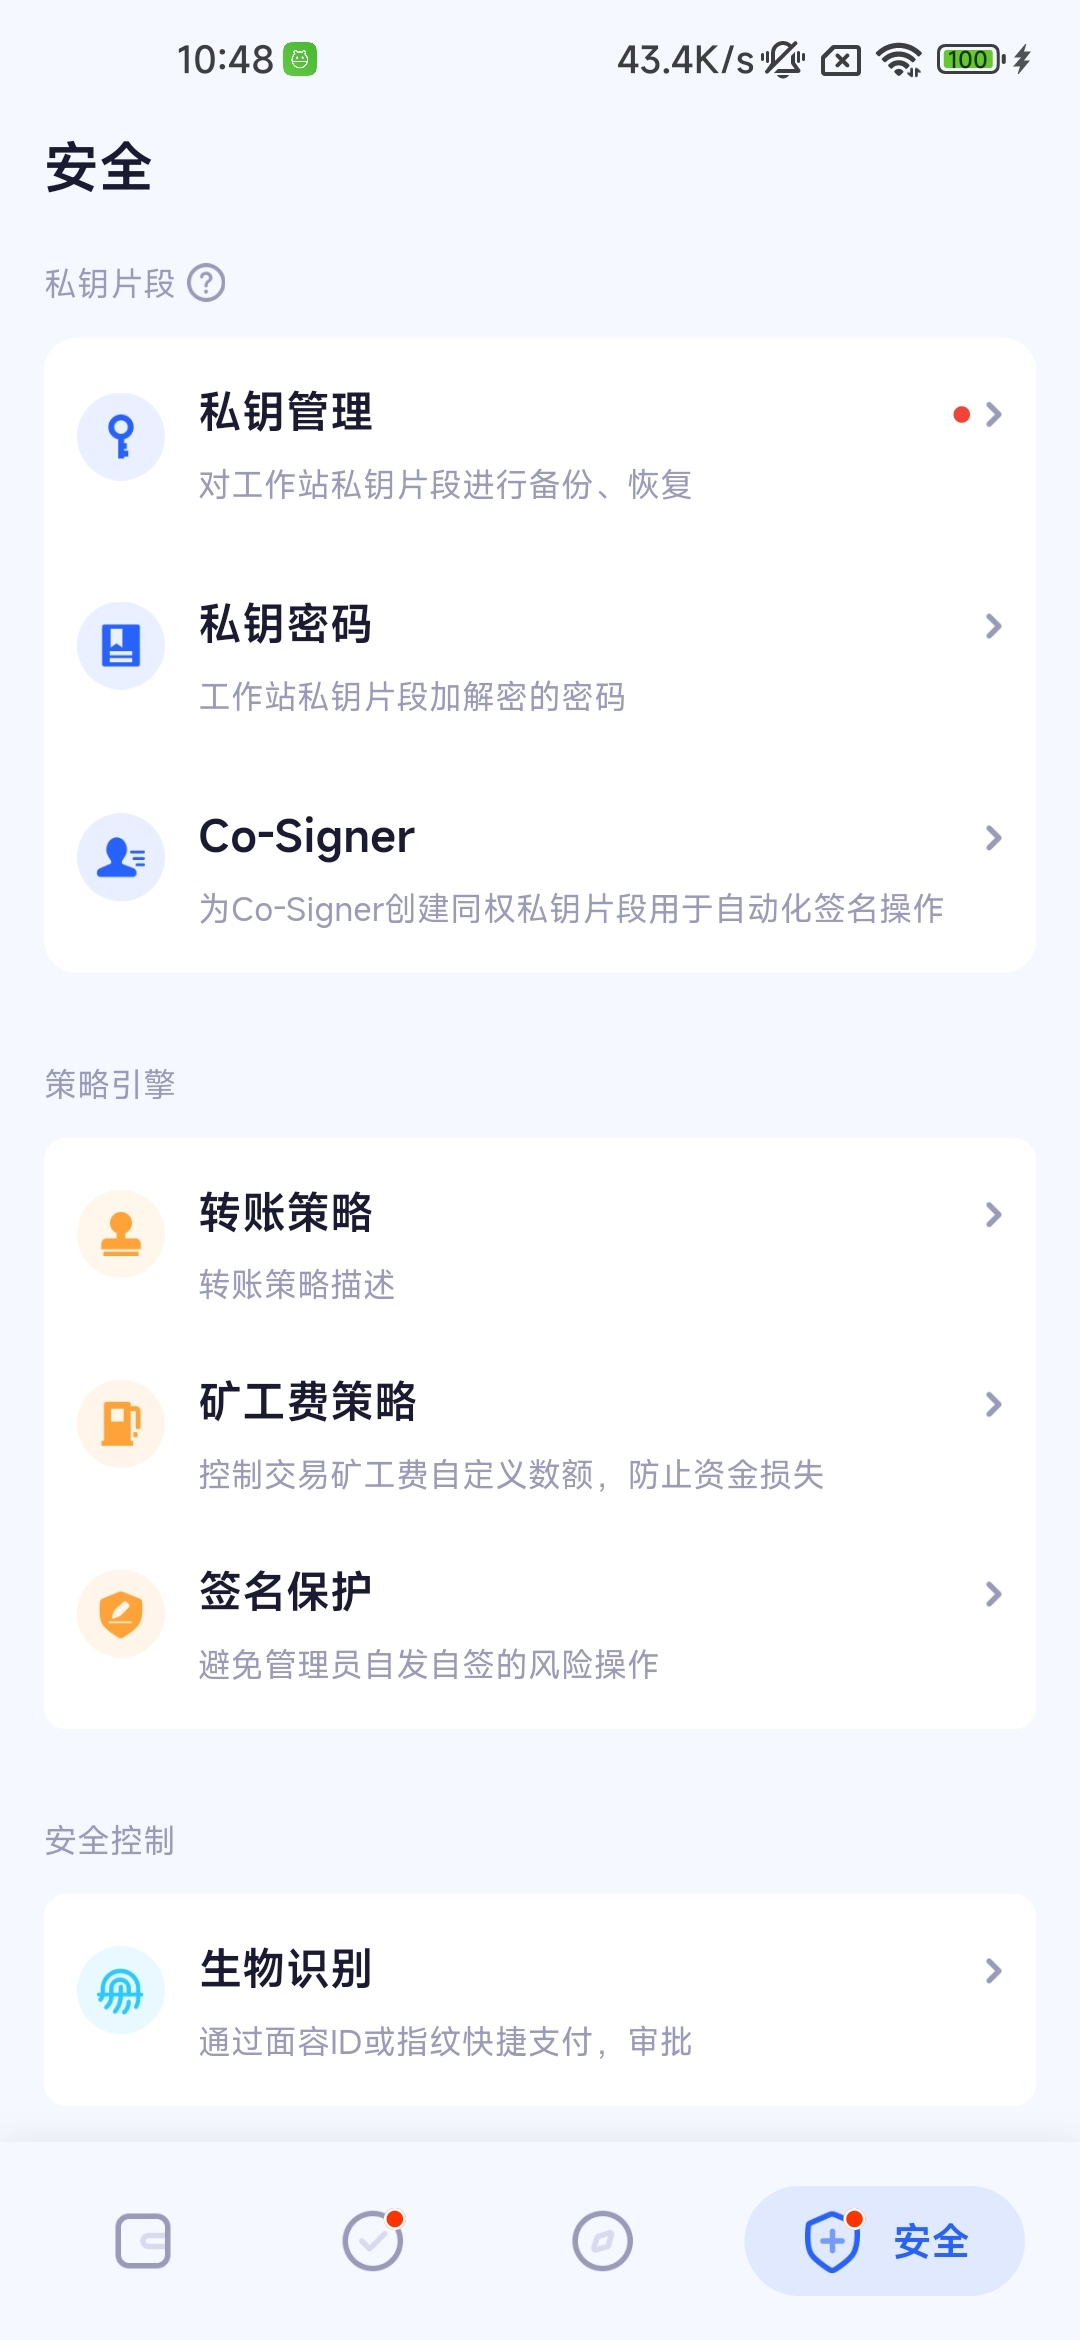
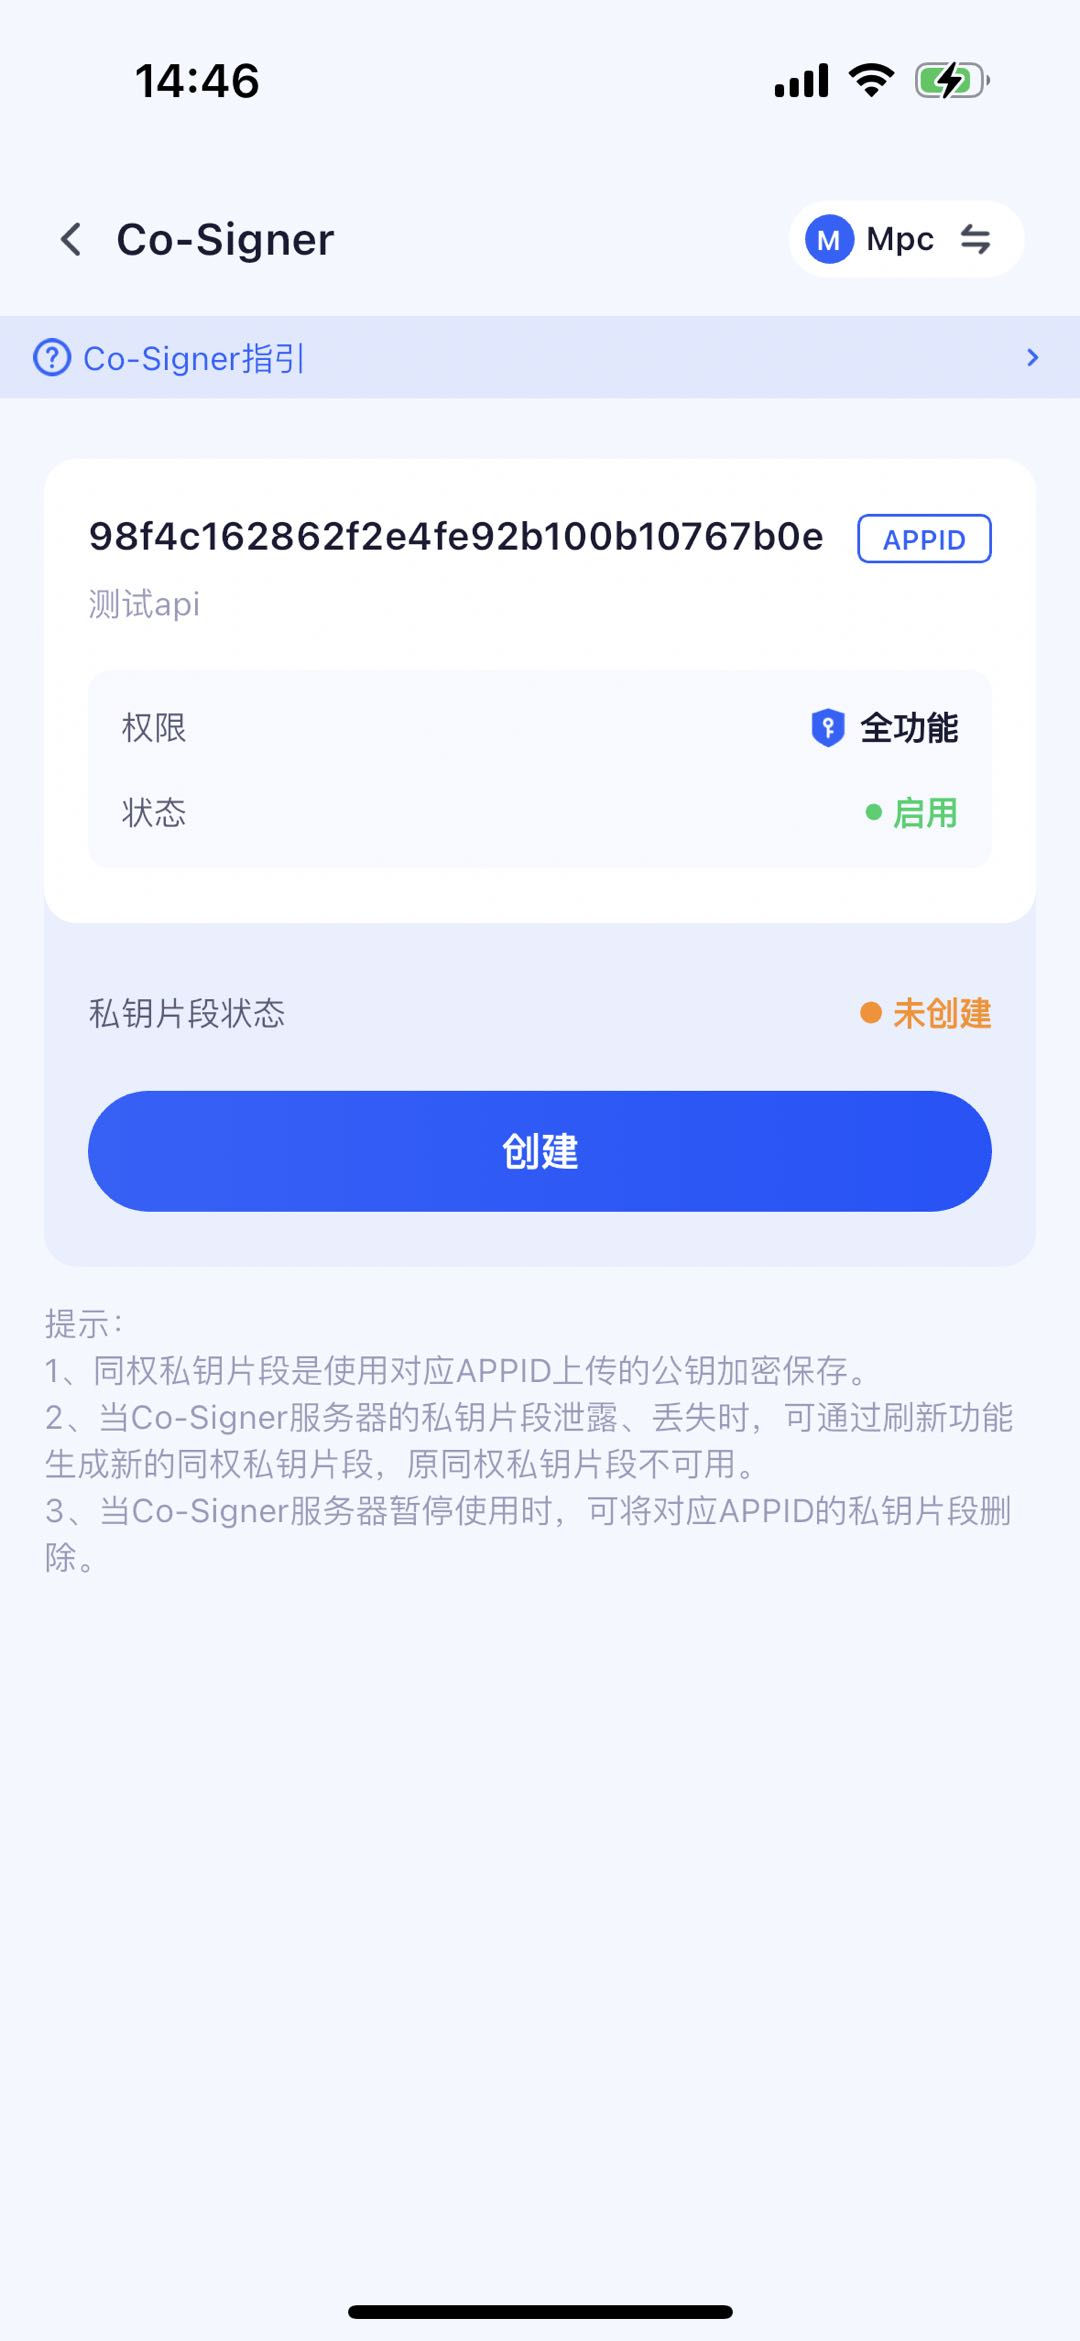
登录APP进行配置
登录APP后,进入安全页面并选择Co-Signer开始配置,为当前工作站API创建私钥分片。
完成该步骤后,即可将APP端签名能力与已部署的Co-Signer服务联动。
sgx-build.sh
使用SGX环境下的Co-Signer时
执行sgx-build.sh脚本,按照提示步骤,安装SGX下运行Co-Signer的必要环境及相关配置
#!/bin/bash
## sgx build command
## run on ubuntu:20.04

#! /bin/bash
if command -v ego >/dev/null 2>&1; then
  echo "ego already installed..."
else
  apt update
  apt install -y sudo
  sudo apt update

  export DEBIAN_FRONTEND=noninteractive TZ=Etc/UTC

  apt-get -y install tzdata
  sudo apt install -y vim git curl python3 net-tools cron wget
  sudo apt install -y gcc make autoconf automake autotools-dev m4 pkg-config
  sudo apt install -y libtool libboost-all-dev libzmq3-dev libminiupnpc-dev libssl-dev libevent-dev bsdmainutils build-essential
  sudo apt install -y bsdmainutils build-essential
  sudo apt-get install -y software-properties-common
  sudo apt-get update
  sudo wget -qO- https://download.01.org/intel-sgx/sgx_repo/ubuntu/intel-sgx-deb.key | sudo apt-key add
  sudo add-apt-repository "deb [arch=amd64] https://download.01.org/intel-sgx/sgx_repo/ubuntu `lsb_release -cs` main"
  sudo wget https://github.com/edgelesssys/ego/releases/download/v1.3.0/ego_1.3.0_amd64.deb
  sudo apt install -y ./ego_1.3.0_amd64.deb build-essential libssl-dev
fi

WORK_DIR=$(
              cd $(dirname $0)
              pwd
          )
echo "work dir: ${WORK_DIR}"
echo ""

CO_SIGNER_BIN=""
echo "Please input co-signer origin bin file name which download in https://github.com/ChainUp-Custody/mpc-co-signer/releases/:"
read CO_SIGNER_BIN

if [ ! -f "$CO_SIGNER_BIN" ]; then
    echo "$CO_SIGNER_BIN not exist"
    exit 1
fi

>./enclave.json
cat>./enclave.json<< EOF
 {
     "exe": "${CO_SIGNER_BIN}",
     "key": "private.pem",
     "debug": false,
     "heapSize": 61440,
     "executableHeap": false,
     "productID": 1,
     "securityVersion": 1,
     "mounts": [{"readOnly":false, "type":"hostfs", "source":"/etc/ssl/certs/", "target":"/etc/ssl/certs/"},{"readOnly":false, "type":"hostfs", "source":"${WORK_DIR}", "target":"${WORK_DIR}"}],
     "env": [{"name":"HOME","fromHost":true},{"name":"PWD","value":"${WORK_DIR}"}],
     "files": null
 }
EOF

today=$(date "+%Y%m%d%H%M%S")
CO_SIGNER_SGX_BIN="${CO_SIGNER_BIN}.${today}"

export OE_SIMULATION=1
ego sign ${CO_SIGNER_BIN}
ego bundle ${CO_SIGNER_BIN} $CO_SIGNER_SGX_BIN
chmod u+x $CO_SIGNER_SGX_BIN

## need disable simulation end build
unset OE_SIMULATION

echo "Build ${CO_SIGNER_SGX_BIN} success!!!!!"
echo "Please exec \`unset OE_SIMULATION\` disable simulation env"
IV. 添加Co-Signer 服务器白名单
ChainUp Custody需要访问Co-Signer 创建同权私钥、生成地址,故需要将Co-Signer 的启动端口对ChainUp Custody的服务器IP添加安全组或白名单,以下是Custody的IP:
-
入网:Co-Signer 服务器开通Custody服务器(IP: 54.254.7.206)访问28888端口权限,注意28888端口为Co-Signer 程序监听端口,可自定义。
-
出网:Co-Signer 服务器需访问Custody服务器,需开通访问54.251.87.91:443权限。
Was this page helpful?